
1) Jen from Rambling Renovators:
Thanks for having me over Vanessa to share my organizing tips! When it comes to organizing solutions, I like to keep things easy and fast. I find it's easier to keep organized when you have (a) a home for everything, and (b) keep like with like. Here's how I've organized things in my home office:

Magazines are stored by season in magazine holders...
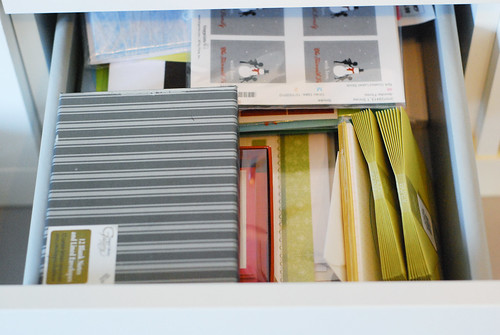
Stationery items are kept together, making it easy to send a quick Thank You note or find a postage stamp...

Fabric goes into metal bins where I can see and access it easily...
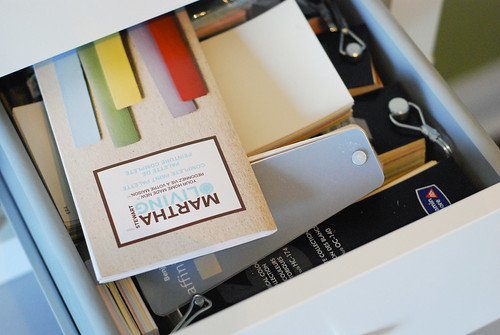
Paint chips have their own spot too....
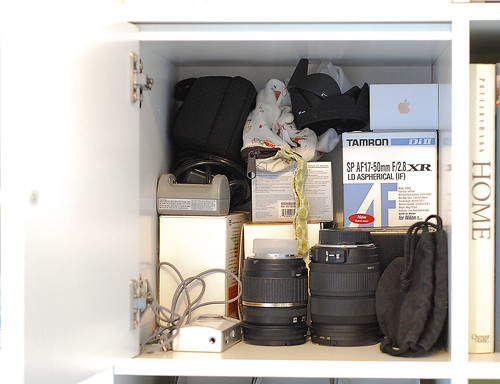
As do all our tech gear - cameras, battery chargers, video cameras, cords. These are kept in a high cabinet, far away from my curious 2-year-old's fingers!
With designated homes for all our stuff, it makes it easier to find things and put them away.
2) Sarah from Sarah Berry Design (London, UK):

I have a giant wall year planner which I use to plot everything. Right now it looks pretty empty as I've only just started to fill out all the yearly events such as birthdays, trade fairs and holidays etc. It's a fabulous work tool as it allows me to see at a glance the forthcoming weeks months and year all in one place, so I can easily block out project time, as well as balance work better by being able to see what I will be working on and when and so can better plan my time. I also add client appointments so I can monitor how much time is allocated and colour code everything, using stickers, post its, labels and highlighter pen as well as the wonderful washi tape for marking out events.
I have the wall planner on my large Homasote board which I covered in neutral linen and which stands on the floor by the door of my office, it's about 5'7" high so I can fit a lot on to it. I use this to prep for moodboards and try samples out together, it's a great way of keeping all my inspiration and project material together and organised, and such a flexible tool.

4) Michael from Michael Penney Style:
3) Sharalee from Escapade:

When Vanessa first approached me about contributing to this series, I had a momentary flash of fear - I glanced around my office space, surveying the chaos and realized that my current 'system' could only be called organized by the same theory that recognizes randomness as a pattern in mathematics. There is a place for everything - and everything soon-to-be in place... at some point, hopefully soon... I have to admit the busyness of the holiday season has left me in a bit of disarray. With a chocker-block full schedule and very few spare minutes, my home office has been left bursting with bits of beautiful inspirations and good intentions. Enter my new organizational best friend - Evernote. A must have for all of you busy bloggers, mums, designers and style savvy women out there who do it all. It's perfect for people like me who far too often think in pictures and have a dozen projects on the go at any given moment. You can use this handy app to create reminders and to-do lists, store photos, create folders for different categories and create moodboards. What's better, it seamlessly syncs your phone and laptop so your inspiration is available wherever you are. Suddenly my desk full of tear sheets and computer screen filled with images have become clear, calm and under control. I couldn't be more delighted.
4) Michael from Michael Penney Style:

Love the look of built-ins but can't stand the price? Do what I did in my old apartment and use three ordinary Billy Bookcases from Ikea side by side. Then head to Home Depot for some MDF, pre-primed flat stock which you have cut to size at the store. Just get two horizontal pieces to tie the three bookcases together and four vertical pieces to trim out the edges of the book cases and cover your seams where two butt together. Simply predrill tiny holes and use small finishing nails to attach the MDF to the bookcases and hold everything together. Then counter sink and fill holes with putty. After sanding, I used Benjamin Moore's Cloud White (CC 40) paint in a semigloss finish to paint out the MDF. And there you have it - DIY and super affordable built ins!
Thank you all for participating - what wonderful ideas! I may just borrow a few. I will post Part III next Tuesday. Stay tuned for some small space storage solutions and some closet makeovers!
Have a happy weekend!

0 comments:
Post a Comment